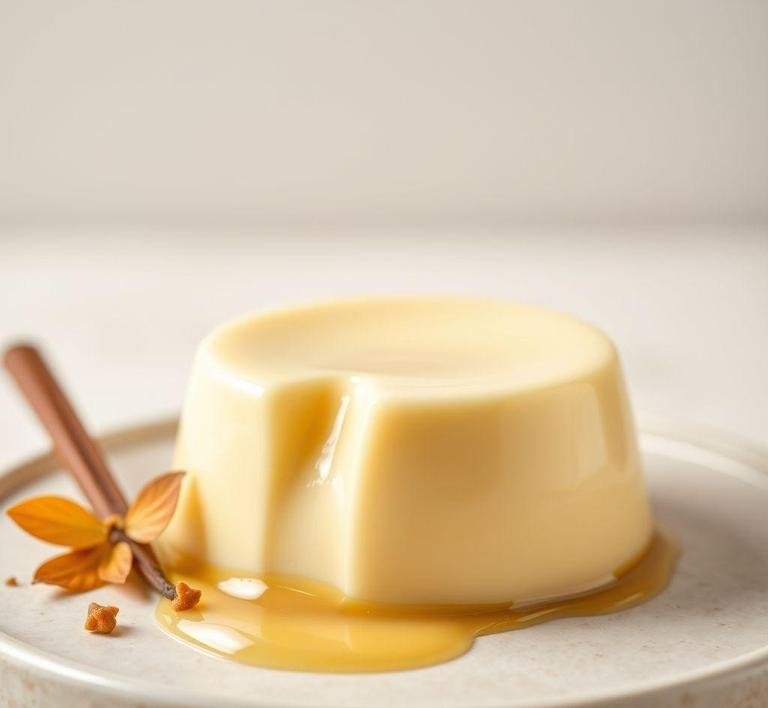
Jamie Oliver’s Vanilla Custard is the kind of dessert that feels like a warm hug on a chilly day. It’s a classic British custard, silky smooth and bursting with natural vanilla flavor. Unlike store-bought versions, this custard is made from scratch, using fresh ingredients. The magic is in the slow cooking. the gentle heat lets the eggs, cream and vanilla meld into this luscious, creamy delight. It’s rich but not heavy, with that perfect balance of sweetness and that unmistakable vanilla aroma.
What makes Jamie’s version stand out? It’s simplicity. He keeps it real. no fancy stabilizers or weird additives, just honest ingredients and traditional technique. You don’t need to be a pro to nail it either. It’s a brilliant example of how great food doesn’t have to be complicated. Serve it warm over a crumble, pour it on fresh berries or enjoy it on its own. It’s comfort food at its finest.
Jamie Oliver Vanilla Custard Recipe
Ingredients Needed
To make this custard, you won’t need a dozen exotic things. Jamie’s recipe sticks to the basics which is part of its charm. Here’s what you’ll need:
- Whole milk and double cream: The creamy base that gives custard its rich texture. Jamie uses a mix to keep it smooth but not too heavy.
- Egg yolks: These are the stars of the show, providing the custard with its structure and that beautiful yellow color.
- Sugar: Just enough to sweeten but not overpower the natural vanilla.
- Vanilla pod: Jamie insists on the real deal here. The seeds from a fresh vanilla pod give that deep, fragrant vanilla flavor you just can’t get from extract.
- Salt: A tiny pinch to enhance all the flavors and keep things balanced.
No shortcuts here-each ingredient plays a crucial role and using fresh, quality stuff really makes a difference.
Equipment Needed
Making Jamie Oliver’s custard is straightforward and the tools you need are pretty standard kitchen stuff:
- Saucepan: A medium-sized, heavy-bottomed one works best. It helps cook the custard evenly without burning.
- Mixing bowl: For whisking the egg yolks and sugar together.
- Whisk: To combine everything smoothly.
- Wooden spoon or spatula: For stirring the custard gently while it cooks.
- Fine sieve: Optional but ideal for straining the custard to make it extra silky.
- Thermometer: Not necessary but helpful if you want to be precise about the cooking temperature.
- Bowl of cold water or ice bath: To cool the custard quickly if you’re making it ahead.
That’s it! Nothing fancy which makes this recipe super accessible.
How To Make Jamie Oliver’s Vanilla Custard
Alright, here’s where the fun starts. The process is simple but it asks for patience and gentle care:
- Warm the milk and cream: Pour them into your saucepan and split the vanilla pod to scrape out the seeds, adding both seeds and pod to the pan. Heat gently until it’s just about to boil. This step infuses the liquid with that heavenly vanilla scent.
- Whisk egg yolks and sugar: While the milk is warming, whisk together the egg yolks and sugar in a bowl until pale and creamy.
- Temper the eggs: Slowly pour a bit of the hot milk mixture into the egg yolks while whisking constantly. This step is key. it stops the eggs from scrambling when you add them back to the pan.
- Cook the custard: Pour the tempered egg mixture back into the pan and cook over low heat, stirring constantly with your wooden spoon or spatula. This part requires attention. keep stirring, scrape the sides and watch closely as the custard thickens. It should coat the back of your spoon.
- Strain and cool: Once thickened, strain the custard through your sieve to catch any cooked egg bits. Then let it cool slightly or chill it if you want it cold.
The whole process is like a little ritual. It’s about paying attention and loving what you’re doing.
What I Learnt
Making Jamie Oliver’s custard taught me a few things beyond the recipe itself. First, the importance of patience. rushing leads to curdled eggs and wasted effort. Slow and steady wins the custard race.
Second, how fresh ingredients truly change the game. The vanilla pod, especially, is a game-changer. It’s not just about flavor; it’s about aroma and that little burst of natural sweetness you can’t fake.
Finally, I realized cooking from scratch gives this deeper connection to the food. It’s comforting and satisfying knowing you made something so classic and delicious with your own hands.
Recipe Tweaks For Jamie Oliver’s Vanilla Custard
Jamie Oliver’s vanilla custard is already a treat-creamy, smooth and wonderfully fragrant. But if you want to make it your own, there are some simple tweaks to try.
First, the vanilla. Jamie often uses whole vanilla pods which give a rich, natural flavor. But if you want something quicker, good-quality vanilla extract works fine too. For a more intense vanilla hit, try scraping the seeds from the pod and adding a touch of vanilla bean paste. It’s like vanilla on steroids-super aromatic and gorgeous flecks in your custard.
Next, the texture. Jamie’s recipe usually leans toward a pourable custard, perfect for drizzling over desserts. If you want a thicker custard-something you can spoon or layer in desserts-cook it a little longer over low heat. Patience is key here; slow stirring prevents lumps and gives you a silken finish.
If you’re feeling adventurous, toss in a pinch of cinnamon or nutmeg. It adds warmth without stealing the spotlight from the vanilla. Or a splash of orange zest can brighten things up, giving your custard a fresh twist.
For those watching sugar intake, reduce the sugar slightly but don’t cut too much or you lose the balance. Instead, add a little natural sweetness with honey or maple syrup. this changes the flavor profile subtly and beautifully.
Storage Tips For Leftovers
Leftover custard? You’re in luck-this treat stores pretty well if you do it right.
Always cool it quickly after cooking. Pour the custard into a clean container, cover it with cling film pressed directly onto the surface. This stops a skin from forming which is the enemy of silky custard. Then pop it in the fridge.
In the fridge, it’ll keep for up to three days. Don’t let it hang out too long though; custard starts to separate and lose that lovely texture after a while.
When you want to use it again, warm it gently on low heat or in the microwave in short bursts, stirring often. Avoid boiling it again or it’ll curdle. If it’s thickened too much, whisk in a splash of milk or cream to loosen it back up.
If you’re freezing custard, beware-texture changes a lot. It’s not ideal but if you must, freeze it in an airtight container and thaw in the fridge. Expect some separation and plan to use it in cooked dishes like baked puddings where texture isn’t as crucial.
What To Eat With Jamie Oliver’s Vanilla Custard?
Jamie’s vanilla custard is like a blank canvas, ready to complement loads of desserts. Classic pairings include warm apple crumble or sticky toffee pudding. The custard’s creamy sweetness balances the tartness of baked fruits or the richness of sticky sauces.
It’s also amazing with fresh berries-strawberries, raspberries, blueberries-adding a juicy pop against the smooth custard. Spoon it over pancakes or waffles for a simple but indulgent breakfast or brunch treat.
For something a bit fancier, try it with poached pears or figs. The custard mellows the fruit’s acidity and creates a luscious combo that’s stunning on a dessert plate.
And if you’re into baking, use it as a filling for tarts or trifles. Layer it with sponge cake and fruit for a stunning, creamy dessert that’s sure to wow guests.
FAQs
What Makes Jamie Oliver’s Vanilla Custard So Creamy?
The secret is using a mix of full-fat milk, cream, and egg yolks. It creates a rich, velvety texture.
Can I Make Jamie Oliver’s Vanilla Custard Ahead Of Time?
Yes! You can prepare it in advance. Just store it in the fridge and give it a gentle reheat before serving.
How Do I Prevent The Custard From Curdling While Cooking?
Make sure to stir continuously over low heat and remove it from the heat as soon as it thickens. Patience is key!