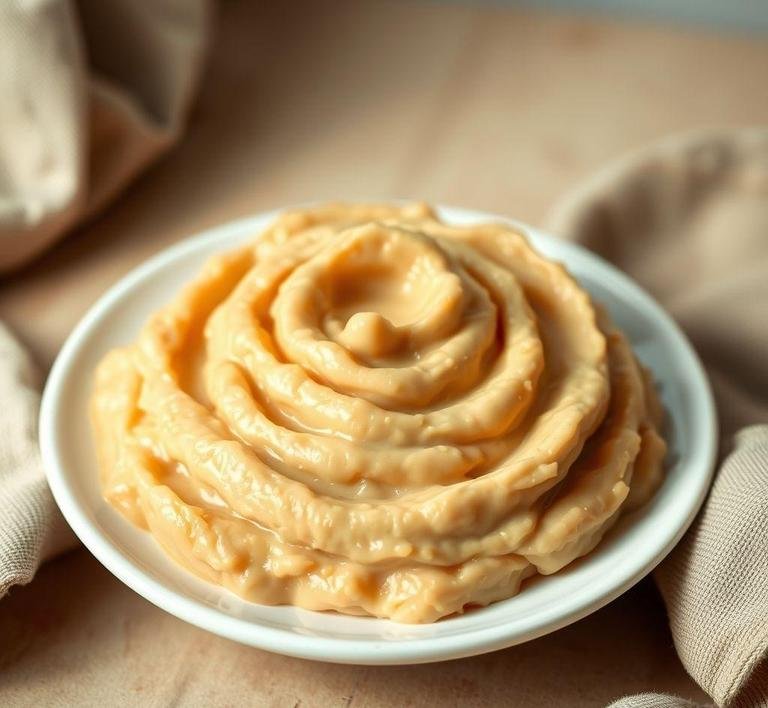
Jamie Oliver’s Butter Bean Mash is a twist on the classic mashed potato. Instead of using spuds, Jamie uses butter beans (also called lima beans) which are super creamy and rich in flavor. This mash has a silky, smooth texture and a mild, nutty taste that sets it apart from the usual mash. It’s a perfect side dish that pairs well with meats, veggies or even as a standalone vegan option. The best part? It’s quick and easy, making it a fantastic weeknight dinner option or something you can serve at a dinner party to impress guests.
Jamie Oliver Butter Bean Mash Recipe
Ingredients Needed
The ingredients for Jamie Oliver’s Butter Bean Mash are simple yet full of flavor:
- Butter Beans (Canned or Cooked): You’ll need about two cans of butter beans. They’re the star of the dish, offering the creamy texture that replaces potatoes. You can use dried beans too but canned ones are way quicker.
- Garlic: A couple of garlic cloves will give it a bit of warmth and depth. Don’t skip this; it’s the key to flavor!
- Olive Oil: A generous splash of extra virgin olive oil adds richness to the mash and helps bring all the flavors together.
- Fresh Rosemary or Thyme: A few sprigs of fresh herbs give the mash an earthy, aromatic flavor.
- Lemon: A squeeze of fresh lemon juice brightens the whole dish and balances the richness of the butter beans.
- Salt and Pepper: Essential for seasoning-salt brings out the natural flavors and pepper adds a slight kick.
Equipment Needed
You don’t need much for this dish, just some basic kitchen tools:
- Large Pot: To cook the beans (if you’re using dried) or heat them (if using canned).
- Knife and Chopping Board: For chopping the garlic and herbs.
- Fork or Potato Masher: To mash the beans. A fork works just fine if you’re doing a small batch but a masher can give it a more traditional mashed potato texture.
- Large Mixing Spoon or Spatula: For stirring everything together once it’s all mashed up.
- Lemon Zester or Grater (Optional): If you want to zest the lemon before juicing it.
How To Make Jamie Oliver’s Butter Bean Mash
Making this mash is ridiculously simple. Here’s the step-by-step:
- Prepare the Beans: If you’re using canned butter beans, just drain and rinse them to get rid of any excess liquid. If you’re using dried beans, cook them according to the package instructions (they’ll take longer, so plan ahead).
- Infuse the Garlic and Herbs: In a large pot, add a splash of olive oil and heat it over medium heat. Throw in the garlic and fresh rosemary or thyme. Gently fry them for about 2 minutes until the garlic softens and becomes aromatic. Be careful not to burn the garlic!
- Add the Butter Beans: Now, toss the butter beans into the pot with the garlic and herbs. Stir everything together to combine.
- Mash It Up: Take a fork or potato masher and begin mashing the beans. The goal is to create a smooth, creamy consistency. If you want a slightly chunkier texture, stop mashing earlier.
- Finish with Lemon and Seasoning: Once mashed, stir in a generous squeeze of lemon juice, add salt and pepper to taste and drizzle in some more olive oil to give it a nice sheen and richness.
- Serve: You can serve it warm straight away and it works wonderfully with roasted meats, grilled vegetables or even a simple salad.
What I Learnt
The most important thing I learned when making Jamie Oliver’s Butter Bean Mash is that simple ingredients can truly shine when prepared properly. The combination of creamy butter beans, fragrant rosemary and a splash of lemon makes for an incredibly flavorful side dish. I also realized that the texture of the butter beans is surprisingly close to mashed potatoes but with a slight richness that makes it feel a bit more special.
Also, this recipe is very versatile. You can play around with the herbs depending on what you like or have on hand. Adding a little extra garlic or even some grated Parmesan can take it to another level if you want something more indulgent.
Recipe Tweaks For Jamie Oliver’s Butter Bean Mash
Jamie Oliver’s Butter Bean Mash is already pretty stellar but you can always add your personal twist to suit your tastes. A few small tweaks can elevate it or even turn it into something totally new!
-
Herbs & Spices
- Rosemary or Thyme: Adding a sprig of rosemary or a few fresh thyme leaves during the mash process can give a fragrant depth that works beautifully with the butter beans.
- Garlic: While Jamie’s recipe might include a hint of garlic, you can go heavier on it. Sauté the garlic first in some olive oil to bring out its sweetness and add it into the mash. Or roast a bulb for a mild, nutty flavor.
- Chili Flakes: If you’re into a bit of heat, throw in some chili flakes or fresh chopped chili to give the mash a little kick.
-
Cheese
- A generous amount of grated Parmesan or even a sharp Cheddar can add extra richness and a bit of umami. You can mix it right into the mash or sprinkle it on top for a crispy finish when baked.
-
Vegetable Variations
- Sweet Potato: Swap some or all of the butter beans with sweet potatoes. The sweetness pairs wonderfully with the creamy beans.
- Cauliflower: If you’re looking to lower carbs or add a vegetable boost, cauliflower can be steamed and mashed alongside the beans. It’ll blend seamlessly and keep the texture light.
- Lemon Zest & Juice: A squeeze of lemon juice or a little zest can bring brightness and balance out the richness of the butter beans.
- Broth or Stock: Instead of using just butter or olive oil, you can create a more savory base by adding a splash of vegetable or chicken stock. It’ll make the mash a little less dense and more flavorful.
Storage Tips For Leftovers
If you’re lucky enough to have leftovers, storing them properly can ensure they stay just as good as the first time you made them!
- Cool Before Storing: Let the mash cool down to room temperature before putting it in an airtight container. This helps preserve the texture and prevents condensation inside the container which can make it soggy.
- Fridge Storage: Store in the fridge for up to 3 days. It should keep well as long as you make sure the container is sealed tightly.
- Freezing: You can freeze the mash if you need to keep it longer. Portion it into smaller containers or freezer bags (make sure to press out any excess air) and it’ll stay fresh for up to 3 months. Just defrost in the fridge overnight before reheating.
- Reheating Tips: When reheating, you might notice it’s a bit drier than when you first made it. Add a splash of milk, broth or even a little olive oil to loosen it up. Heat on low in a pot, stirring occasionally, so it doesn’t burn. You could also microwave it in short intervals, stirring in between.
What To Eat With Jamie Oliver’s Butter Bean Mash?
This mash is so versatile, it pairs beautifully with lots of different dishes. You can go classic, light or adventurous, depending on your mood.
-
Grilled Or Roasted Meats
- It pairs perfectly with roasted chicken, lamb chops or steak. The creaminess of the mash complements the savory richness of meat beautifully.
- Try it with a simple grilled sausage (maybe even a bit spicy, like chorizo) for a hearty and satisfying meal.
-
Vegetarian Options
- A rich vegetable stew or a roasted vegetable platter (think carrots, beets and mushrooms) would work beautifully alongside the butter bean mash.
- If you’re looking for something lighter, a simple green salad with a tangy vinaigrette can cut through the richness of the mash.
-
Fish
- The mash can even be paired with delicate fish, like grilled salmon or a crispy piece of cod. The beans’ creaminess balances the fish’s freshness.
-
With Sauces
- Pour over a rich, hearty gravy or even a tomato-based sauce and you’ve got yourself a delicious, filling meal. A tangy chimichurri sauce also pairs well, adding a punch of flavor.
-
On Its Own
- Honestly, you can eat it straight up! Add a dollop of yogurt or a drizzle of olive oil and it’s a satisfying meal on its own. Or make it a base for a veggie bowl, topping it with roasted veggies, nuts and a sprinkle of feta.
FAQs
What Makes Jamie Oliver’s Butter Bean Mash Different From Regular Mashed Potatoes?
It uses butter beans instead of potatoes, creating a creamy, rich texture with a mild flavor. It’s also healthier and packed with protein!
Can I Make Jamie Oliver’s Butter Bean Mash In Advance?
Yes! You can make it ahead and store it in the fridge for a couple of days. Just reheat it gently before serving.
What Should I Serve With Jamie Oliver’s Butter Bean Mash?
It pairs wonderfully with roasted meats, grilled vegetables, or a fresh salad for a lighter meal. It’s also great as a side with fish or chicken.